Beginner Guide to Motorcycle Tire Pressure Checks
Tire pressure is one of the factors that influences how a motorcycle performs and how long its tires last. Maintaining appropriate pressure levels supports consistent handling and even wear over time. For riders who are new to motorcycle maintenance, understanding the basic methods for checking and adjusting tire pressure can help them take a more active role in their vehicle’s upkeep.
This guide provides an overview of the key concepts and practical steps involved in tire pressure checks. It covers the tools commonly used, the procedures for obtaining accurate readings, and the factors that may affect pressure levels. The information presented here is intended to help riders develop a reliable routine for tire pressure management.
Understanding Tire Pressure and Its Effects
Tire pressure determines the shape and size of the contact patch where the tire meets the road. A lower pressure increases the size of this patch, which can improve grip on certain surfaces but may also generate additional heat and accelerate tread wear in the center. Higher pressure reduces rolling resistance and can improve fuel efficiency, but it may decrease the contact area, which can affect traction in corners or on wet roads.
The relationship between pressure and handling is influenced by the motorcycle’s design, load, and riding conditions. Manufacturers provide recommended pressure values based on these variables, typically found in the owner’s manual or on a sticker near the swingarm or frame. Following these recommendations helps maintain predictable behavior during braking, turning, and acceleration. It is worth noting that deviations from the recommended range can alter the way the motorcycle responds to rider input.
Tire life is also affected by pressure settings. Underinflated tires tend to wear more heavily on the outer edges, while overinflated tires often show accelerated wear in the center. Checking pressure regularly allows riders to identify potential imbalances before they lead to premature tire replacement.
Tools and Equipment for Pressure Checks
A tire pressure gauge is the primary tool used to measure the air pressure inside a motorcycle tire. Gauges come in several types, including analog dial models, digital units, and pencil-style gauges. Each type has its own advantages in terms of accuracy, ease of reading, and durability. Digital gauges are often preferred for their clear display and consistent readings, while analog gauges do not require batteries.
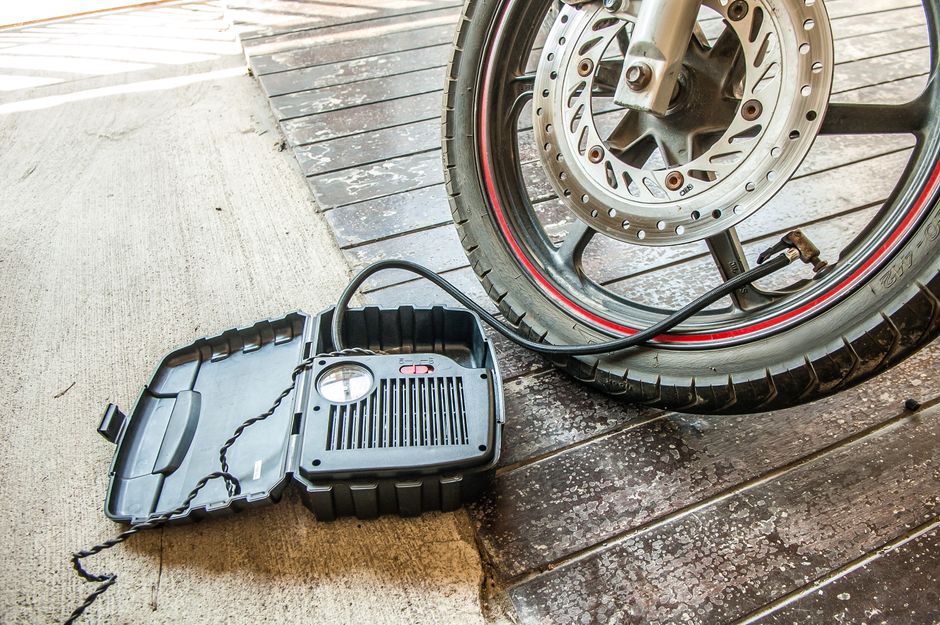
An air pump or compressor is needed to add air when the pressure is too low. Portable hand pumps, foot pumps, and small electric compressors are commonly used for this purpose. Many riders also carry a compact pump for roadside adjustments. Valve caps should be removed before checking or inflating, and it is helpful to have a small tool for removing stubborn caps if necessary.
Some riders choose to use a dedicated pressure gauge that is kept in the garage or carried on the motorcycle. Products from brands such as Moto Pulse offer gauges designed for motorcycle use, with features like right-angle heads that fit valve stems more easily. While the choice of equipment is a matter of personal preference, having a reliable gauge is an important part of the process.
Step-by-Step Procedure for Checking Tire Pressure
To obtain an accurate reading, tires should be checked when they are cold. This means the motorcycle has been stationary for at least three hours or has been ridden only a short distance at moderate speed. Riding heats the tire and raises the internal pressure, which can lead to an inflated measurement that does not reflect the true baseline.
The procedure begins with removing the valve cap from the tire. The cap should be placed in a clean location to avoid contamination. The pressure gauge is then pressed firmly onto the valve stem until a hissing sound stops, indicating a seal has been made. The gauge will display the current pressure, which can be compared to the manufacturer’s recommended value.
It is a good practice to repeat the measurement two or three times to ensure consistency. If the readings vary, the gauge may need to be checked for accuracy or reseated on the valve. Once the reading is noted, the valve cap is replaced and tightened finger-tight. This process is repeated for both the front and rear tires, as recommended pressures often differ between them.
Adjusting Tire Pressure: Inflation Techniques
If the measured pressure is below the recommended level, air must be added. The air pump is connected to the valve stem, and air is introduced in short bursts. After each burst, the pump is removed and the pressure is rechecked with the gauge. This incremental approach helps prevent overinflation, which would require releasing air and repeating the process.
When using a compressor or pump equipped with a built-in gauge, it is still advisable to verify the pressure with a separate, accurate gauge. Built-in gauges on pumps can sometimes be less precise. Overinflation can be corrected by pressing the center pin of the valve stem briefly to release air, then rechecking. It is important to avoid releasing too much air, as this may require starting the inflation process again.
After reaching the desired pressure, the valve cap is replaced securely. The cap helps keep dirt and moisture out of the valve mechanism. Riders should also inspect the tire for any visible damage, such as cuts, bulges, or embedded objects, while performing the pressure check. Addressing these issues promptly can reduce the risk of sudden pressure loss.
Common Considerations and Factors Affecting Pressure
Tire pressure is not static; it changes with temperature, altitude, and load. As ambient temperature drops, the air inside the tire contracts, leading to lower pressure readings. Conversely, hot weather or prolonged riding can cause pressure to rise. A general guideline is that pressure can change by about one psi for every ten degrees Fahrenheit of temperature change.
Load also plays a role. When carrying a passenger or additional cargo, manufacturers often recommend a higher rear tire pressure to accommodate the extra weight. Riders should consult their owner’s manual for load-specific settings. Altitude changes, such as riding in mountainous areas, can also affect pressure, though the impact is usually small for most recreational riding.
Different tire types and constructions may respond differently to pressure changes. Radial tires, for example, often have different recommended pressures than bias-ply tires. Using the wrong pressure for a tire type can alter its performance characteristics. Always referring to the tire manufacturer’s guidance alongside the motorcycle’s recommendations provides a more complete picture.
Recommended Frequency for Pressure Checks
Many riders incorporate a tire pressure check into their pre-ride inspection routine. Checking pressure before each ride, or at least once a week, is a common practice. For motorcycles that are ridden infrequently or stored for extended periods, pressure should be verified before the first ride of the season or after a long period of inactivity.
Seasonal temperature shifts may require adjustments, as cold winter months often see lower pressure readings. Riders who notice a gradual loss of pressure over time may be dealing with a slow leak, valve issue, or porous tire. A consistent monitoring schedule makes it easier to detect such trends early. When in doubt, consulting a professional mechanic or a tire specialist can provide additional guidance tailored to specific motorcycles and riding styles.